This guide was created by a Start9 community member. This is not yet officially supported. Please report any feedback that may help improve the process.
This guide assumes you have already created a ZFS disk pool in Storage > Pool as a place to store your backups. If you need help with this step, see the TrueNAS documentation.
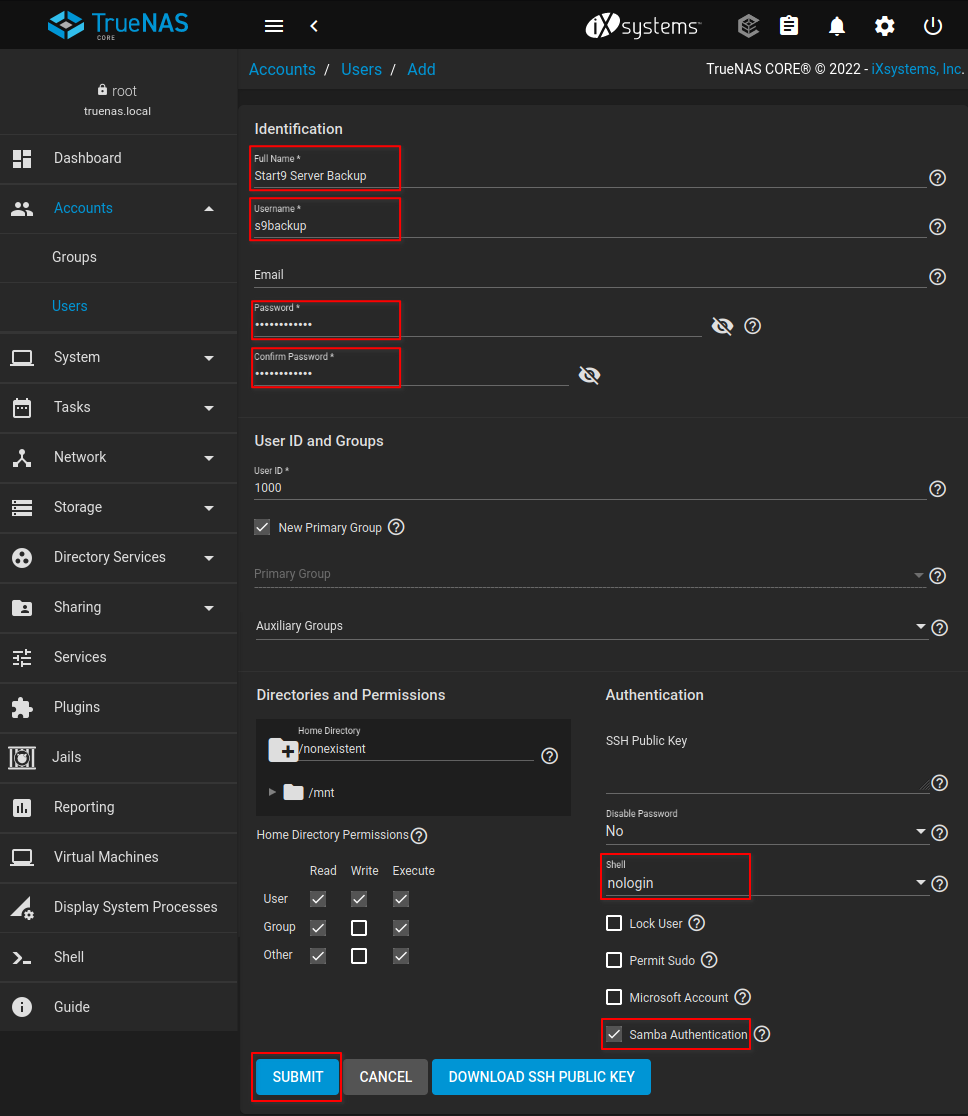
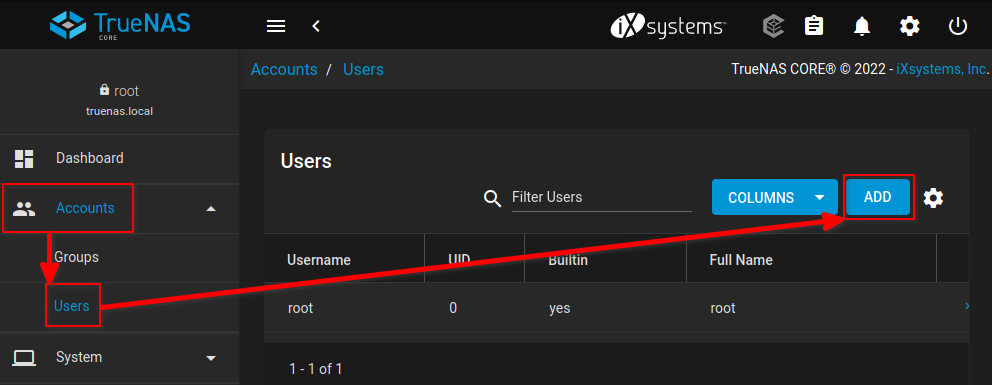
In the TrueNAS UI, to add a user who will write the backups from the Start9 server to the NAS, go to Accounts > Users > ADD:
Fill in a human-readable Full Name, Username, and Password for the new user:
Near the bottom, select Shell: nologin, and enable Samba Authentication.
Click SUBMIT
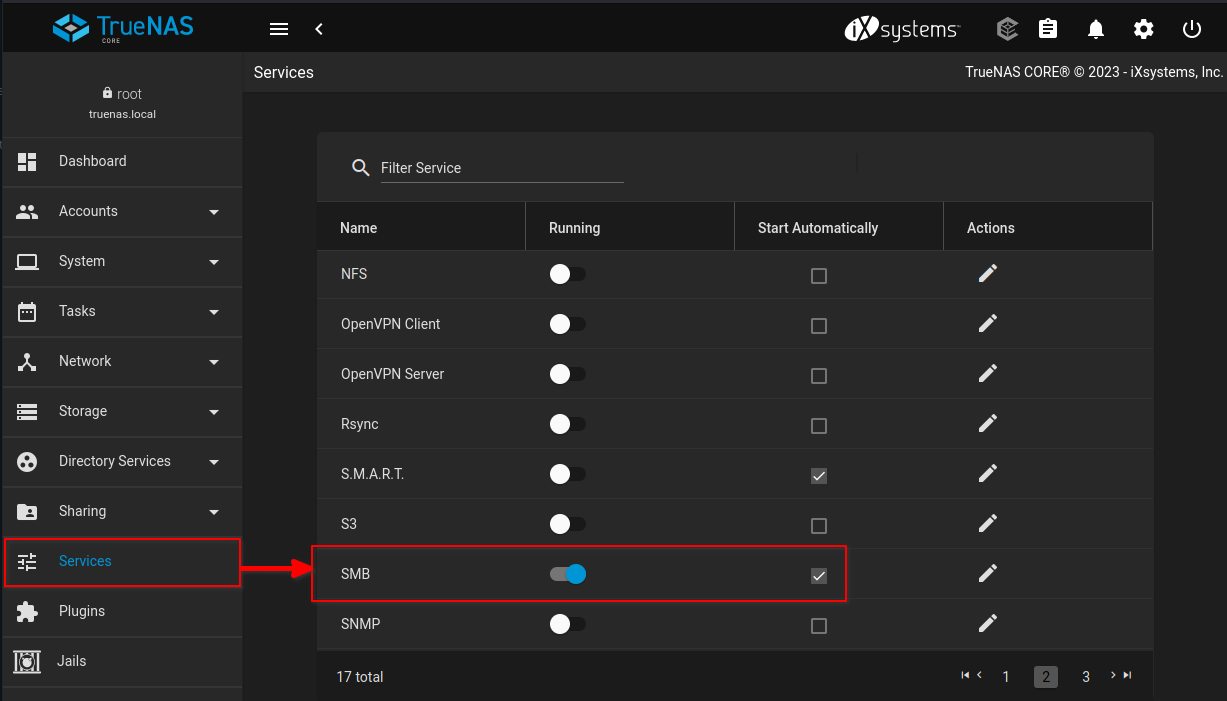
Enable the SMB service via Services > SMB:
Also ensure the Start Automatically box is checked.
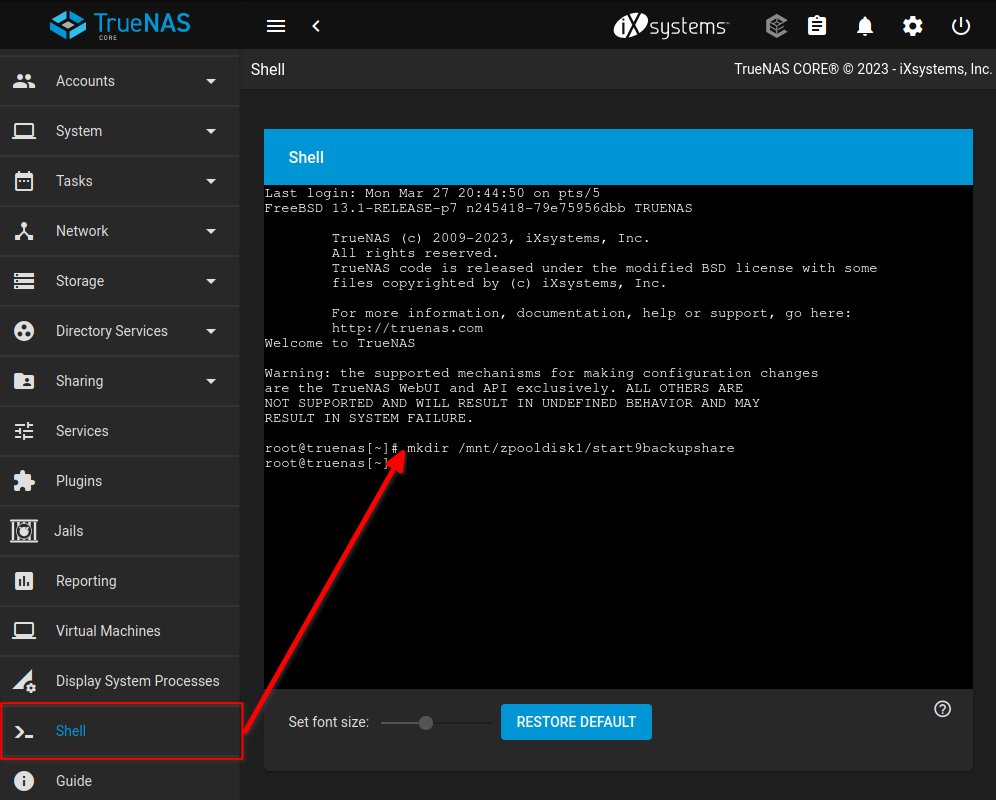
Open a shell and create your backups directory:
In this example, we will create a directory called start9backupshare on the root of our storage pool:
mkdir/mnt/zpooldisk1/start9backupshare
This is the example path we will use in this guide. You may choose a different name or path.
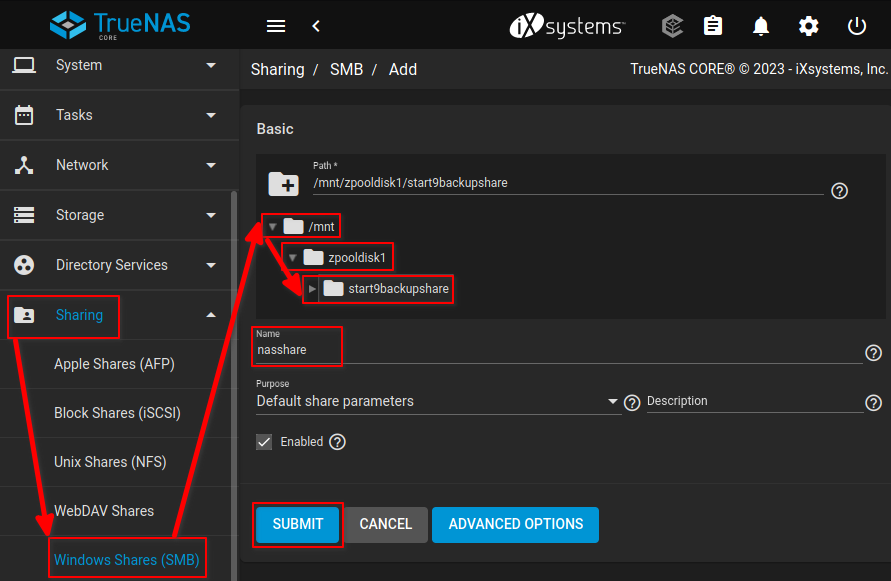
Under Sharing > Windows Shares (SMB), drill down into the path until you find the directory to be shared:
We give the share the Namenasshare
Click SUBMIT to create the share.
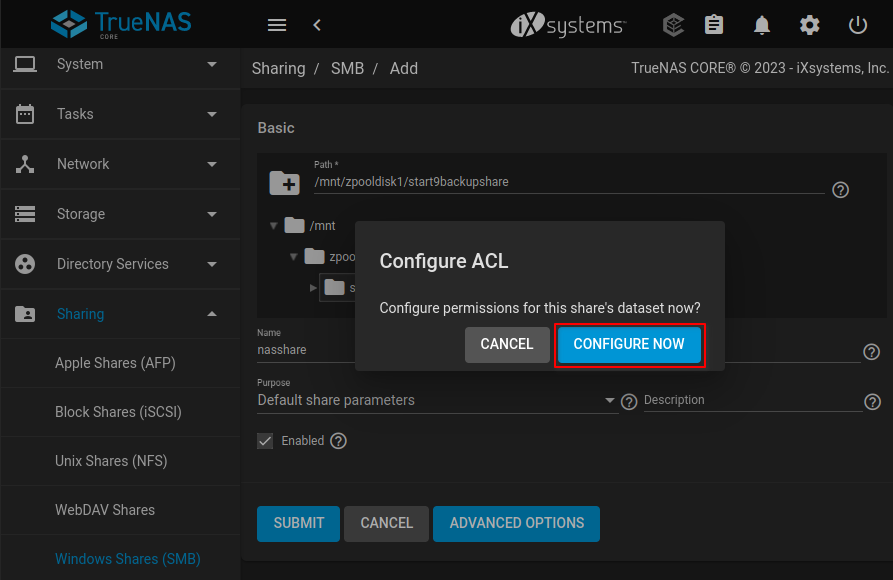
A Configure ACL dialog will emerge. Click CONFIGURE NOW:
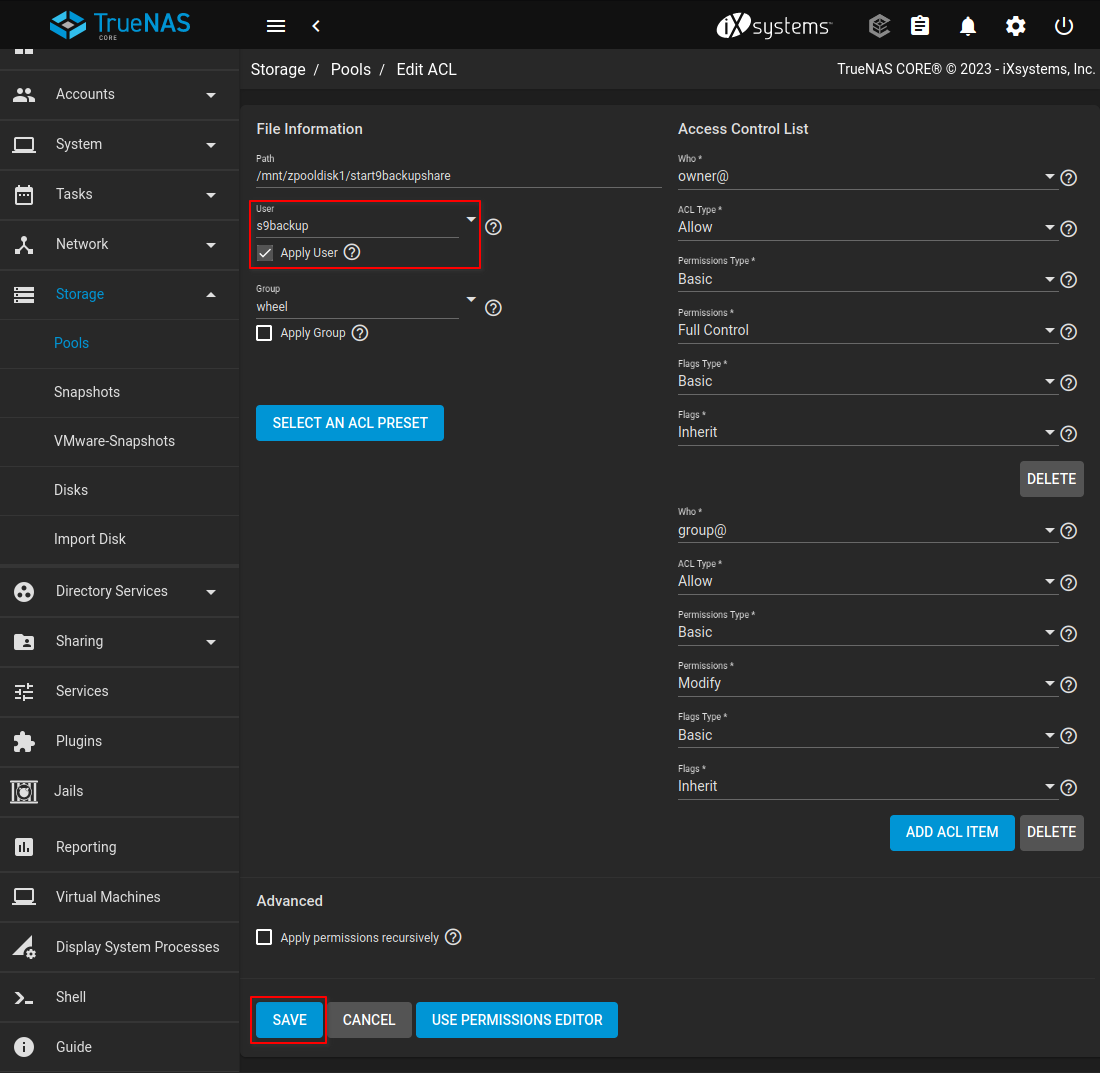
You will be brought to an Edit ACL screen.
Under User check “Apply User” and select or type the username we created in Step 2:
Off to the right-hand side, Permissions Type should be set to “Basic” and Permissions should be set to “Full Control”.
Click SAVE