This guide was created by a Start9 community member. This is not yet officially supported. Please report any feedback that may help improve the process.
In the Synology UI, go to Control Panel > Shared Folder and choose the folder you want to use as the destination for the backup.
Note
Do not select an encrypted folder. Encrypted folders on Synology enforce a character limit of 143 characters. At this time, StartOS backups use folder/file names that are longer than 143 characters. The backup process will fail if you try to backup to an encrypted folder.
Still in the Synology UI, go to Control Panel > File Services > SMB and click the SMB tab if it isn’t already selected. Ensure that “Enable SMB service” is checked.
Under Advanced Settings on the same tab, set “Min SMB protocol” to SMB2 and “Max SMB protocol” to SMB3
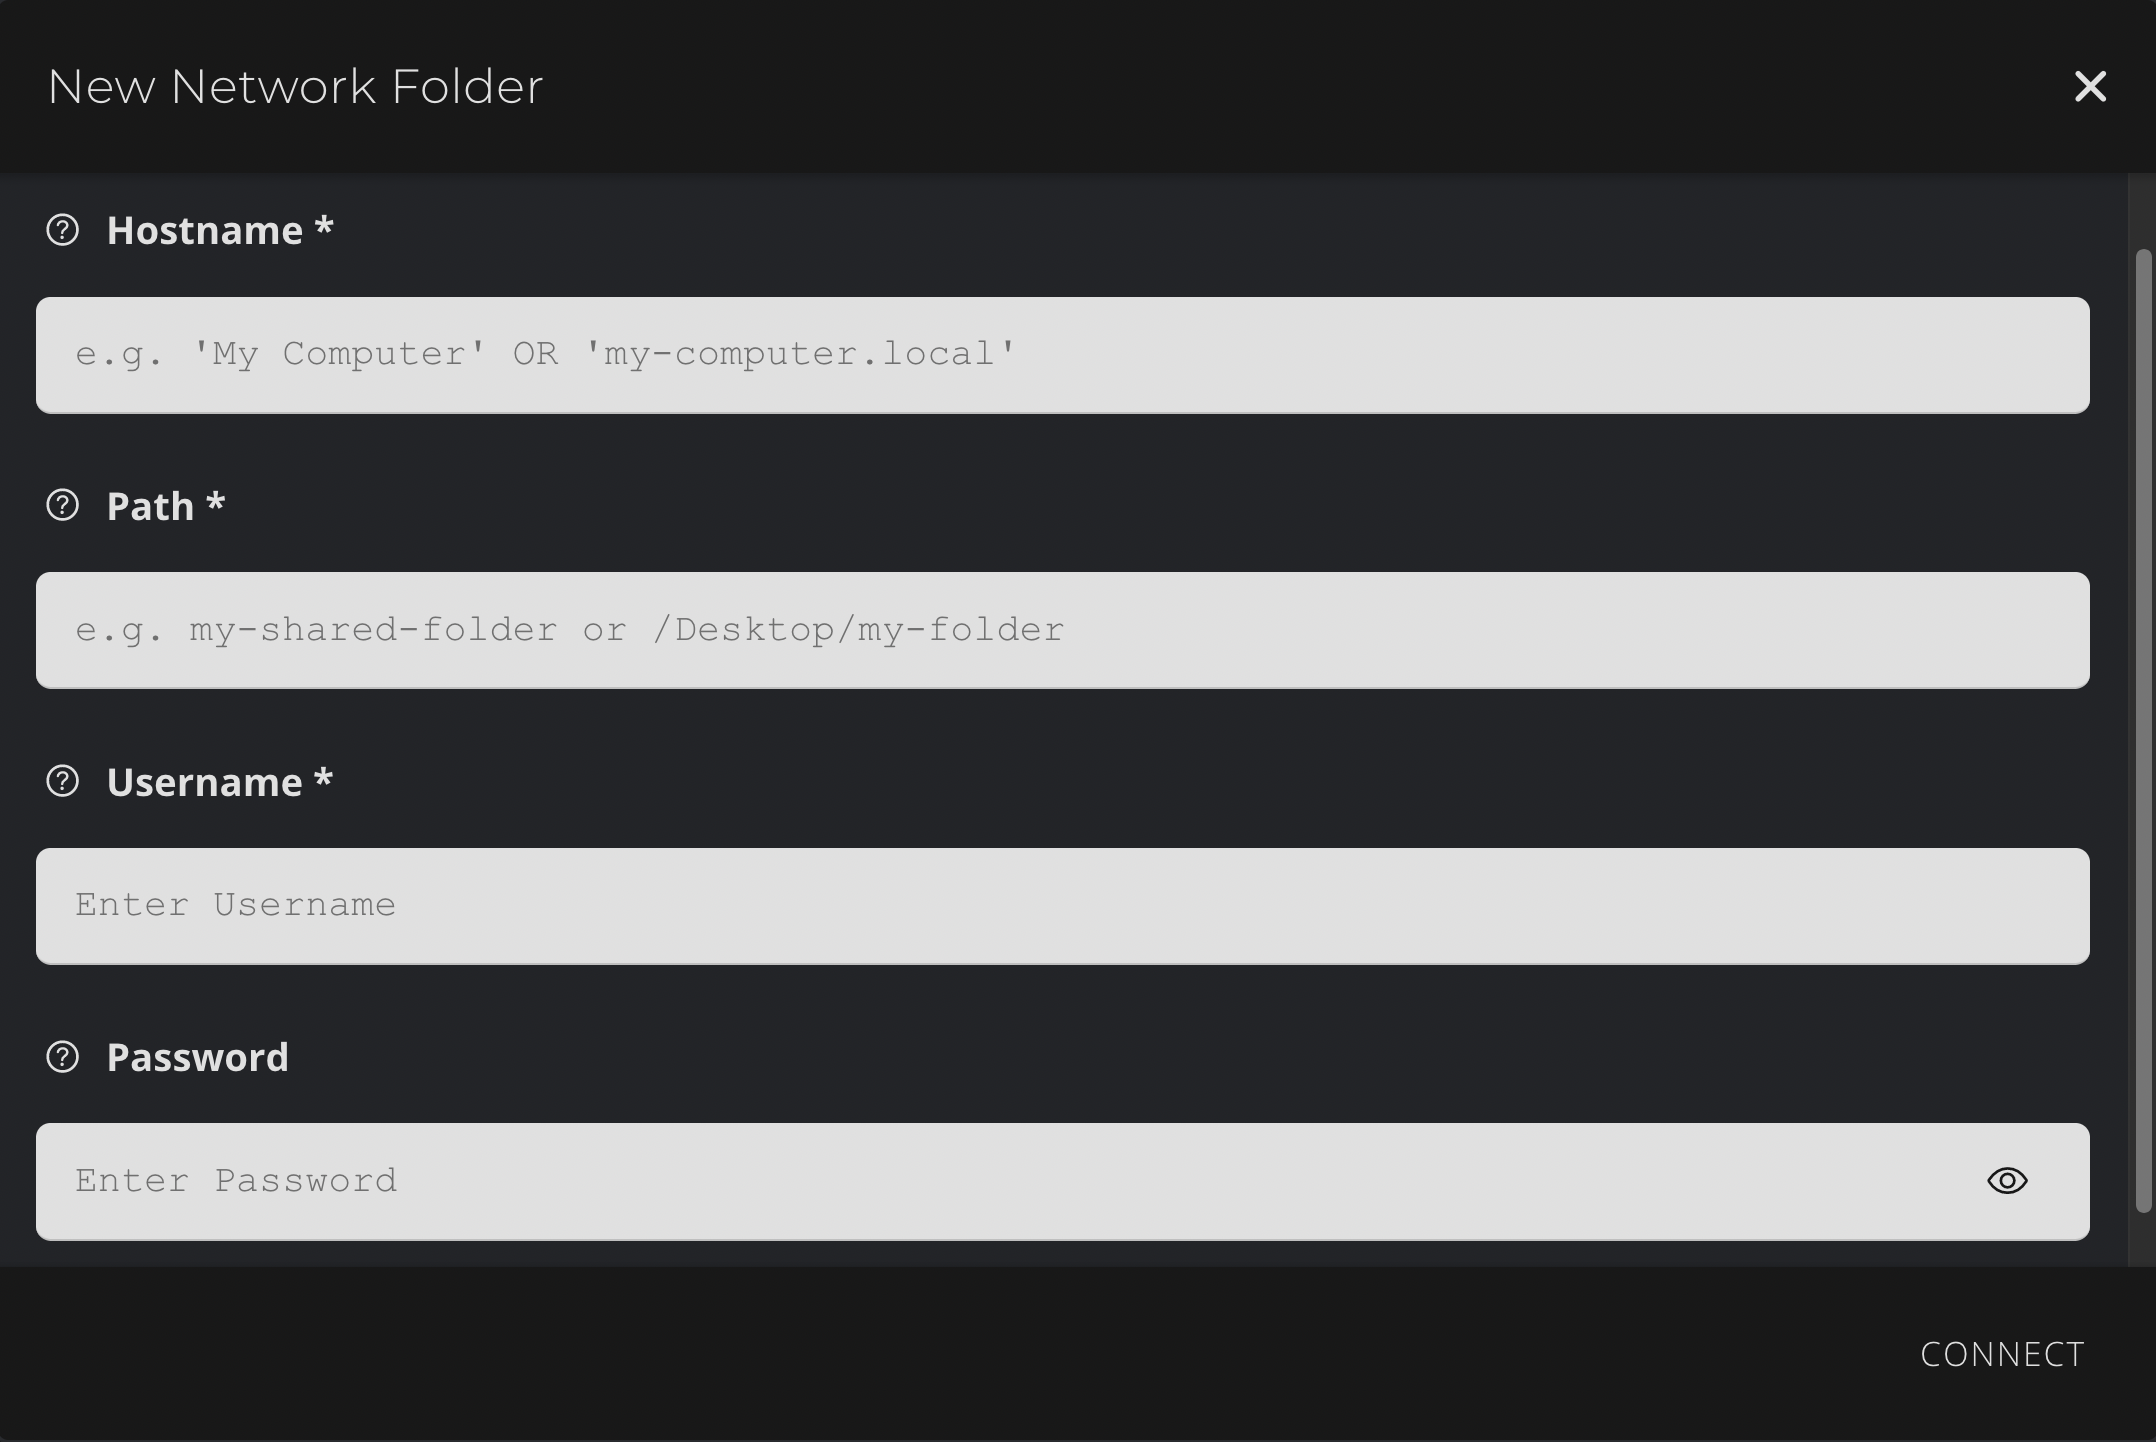
Also on the SMB tab, take note of your device name. Just under “Note” in a pale blue box, you will see “PC (Windows Explorer): ” and “Mac (Finder):”. These both provide network addresses that contain your device’s name. This device name is the “Hostname” you will need to provide within the StartOS “New Network Folder” dialog in step 3 of the “Connect StartOS” section below.
Still in File Services, click on the rsync tab. Click the checkbox to enable the rsync service.
Back in the Synonogy UI, click “File Station” and locate the the desired destination folder. Right click the folder, then Properties > General. Next to “Location” will be a folder location. The portion of the location without the volume label is the value you will use for the “Path” within the StartOS New Network Folder dialog. For example, if the Location is /volume1/Backups, the value you care about is Backups.