Locate your downloaded Root CA. Right click it and select Show in Folder:
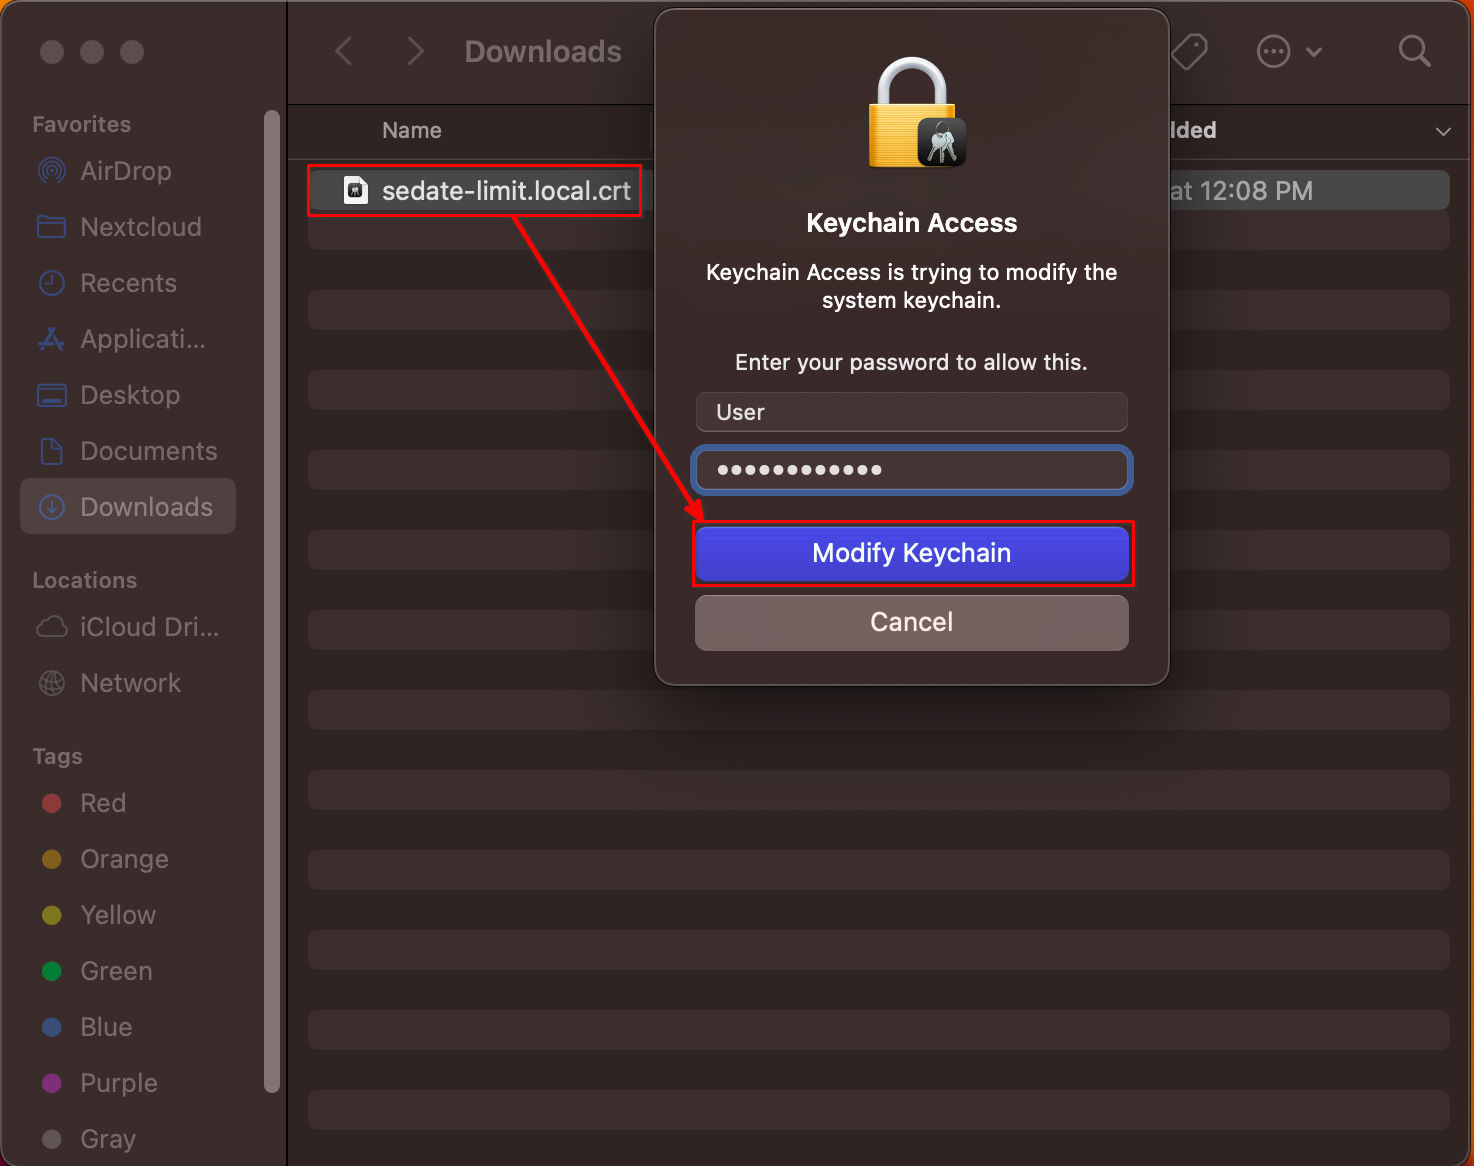
Finder will open. Locate your unique adjective-noun.crt file in your Downloads folder and double click it to import it into the Keychain Access program. You will be prompted for your macOS username and password, or thumbprint. Then select Modify Keychain:
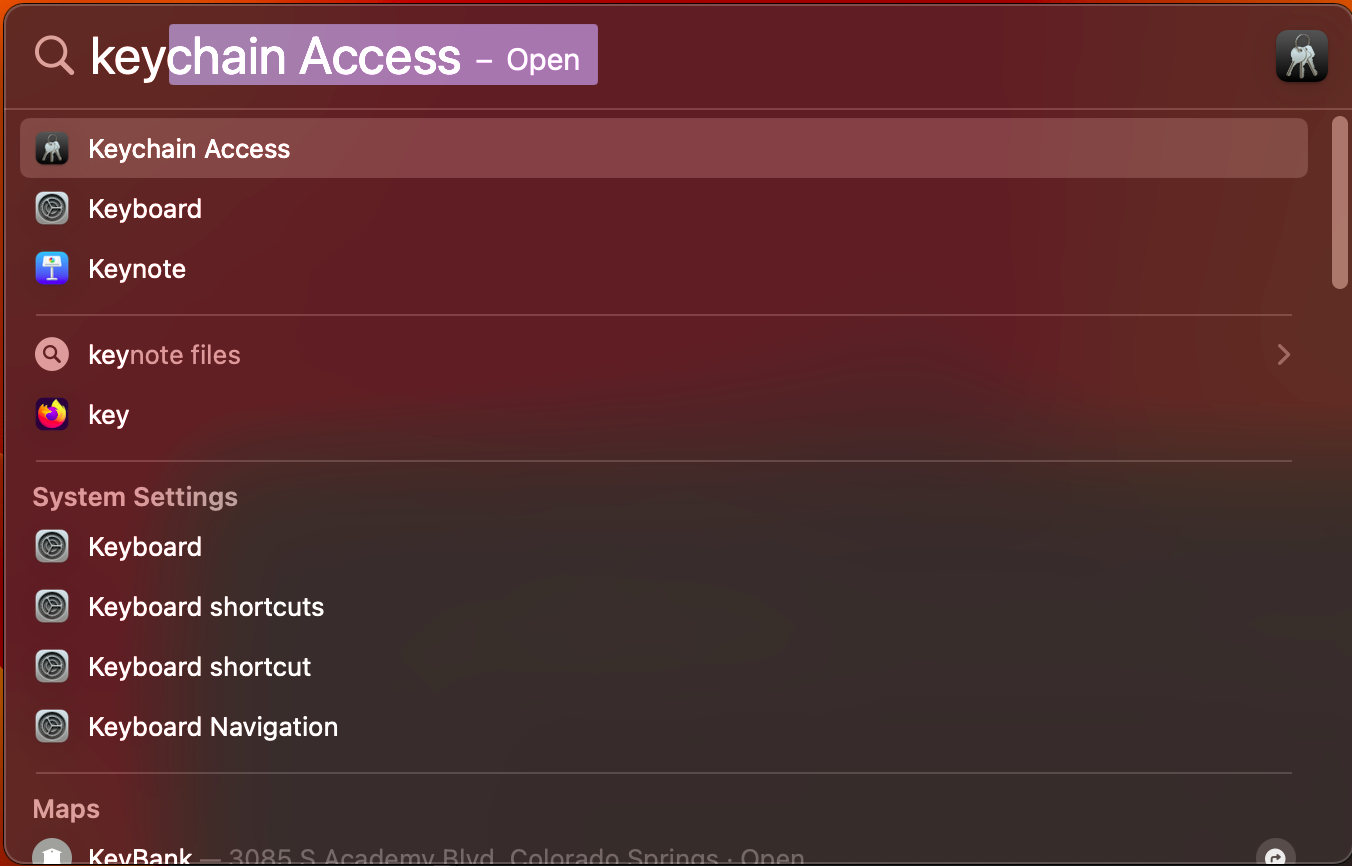
Press Command + Spacebar to launch a program, type in Keychain Access and select the resulting Keychain Access program to open it.
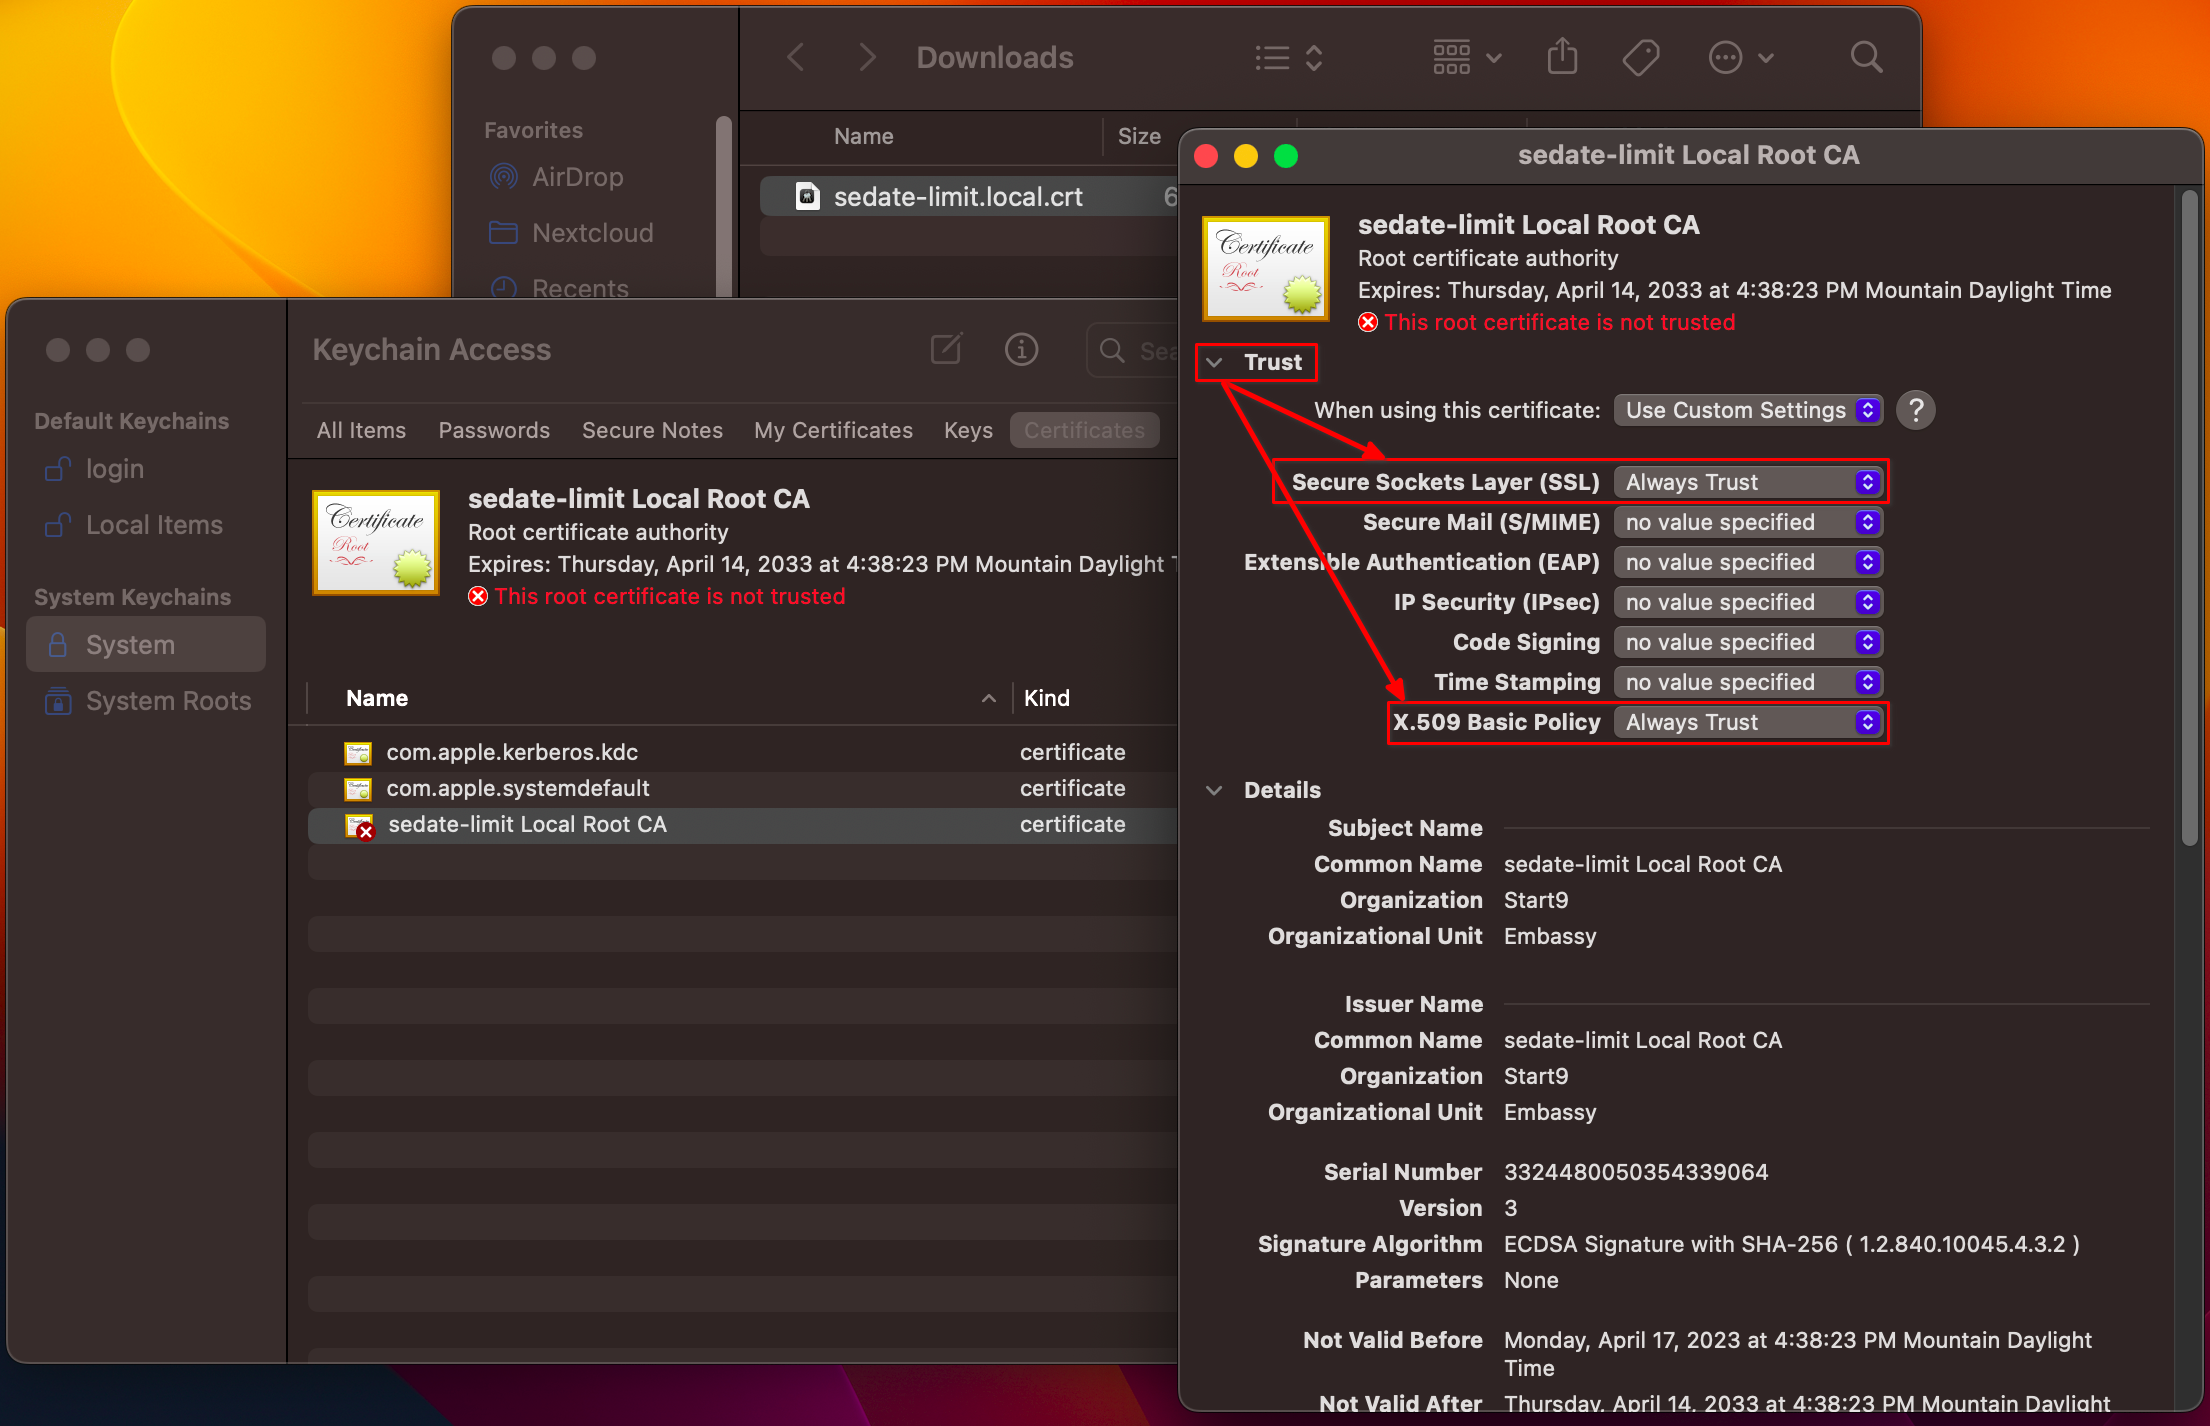
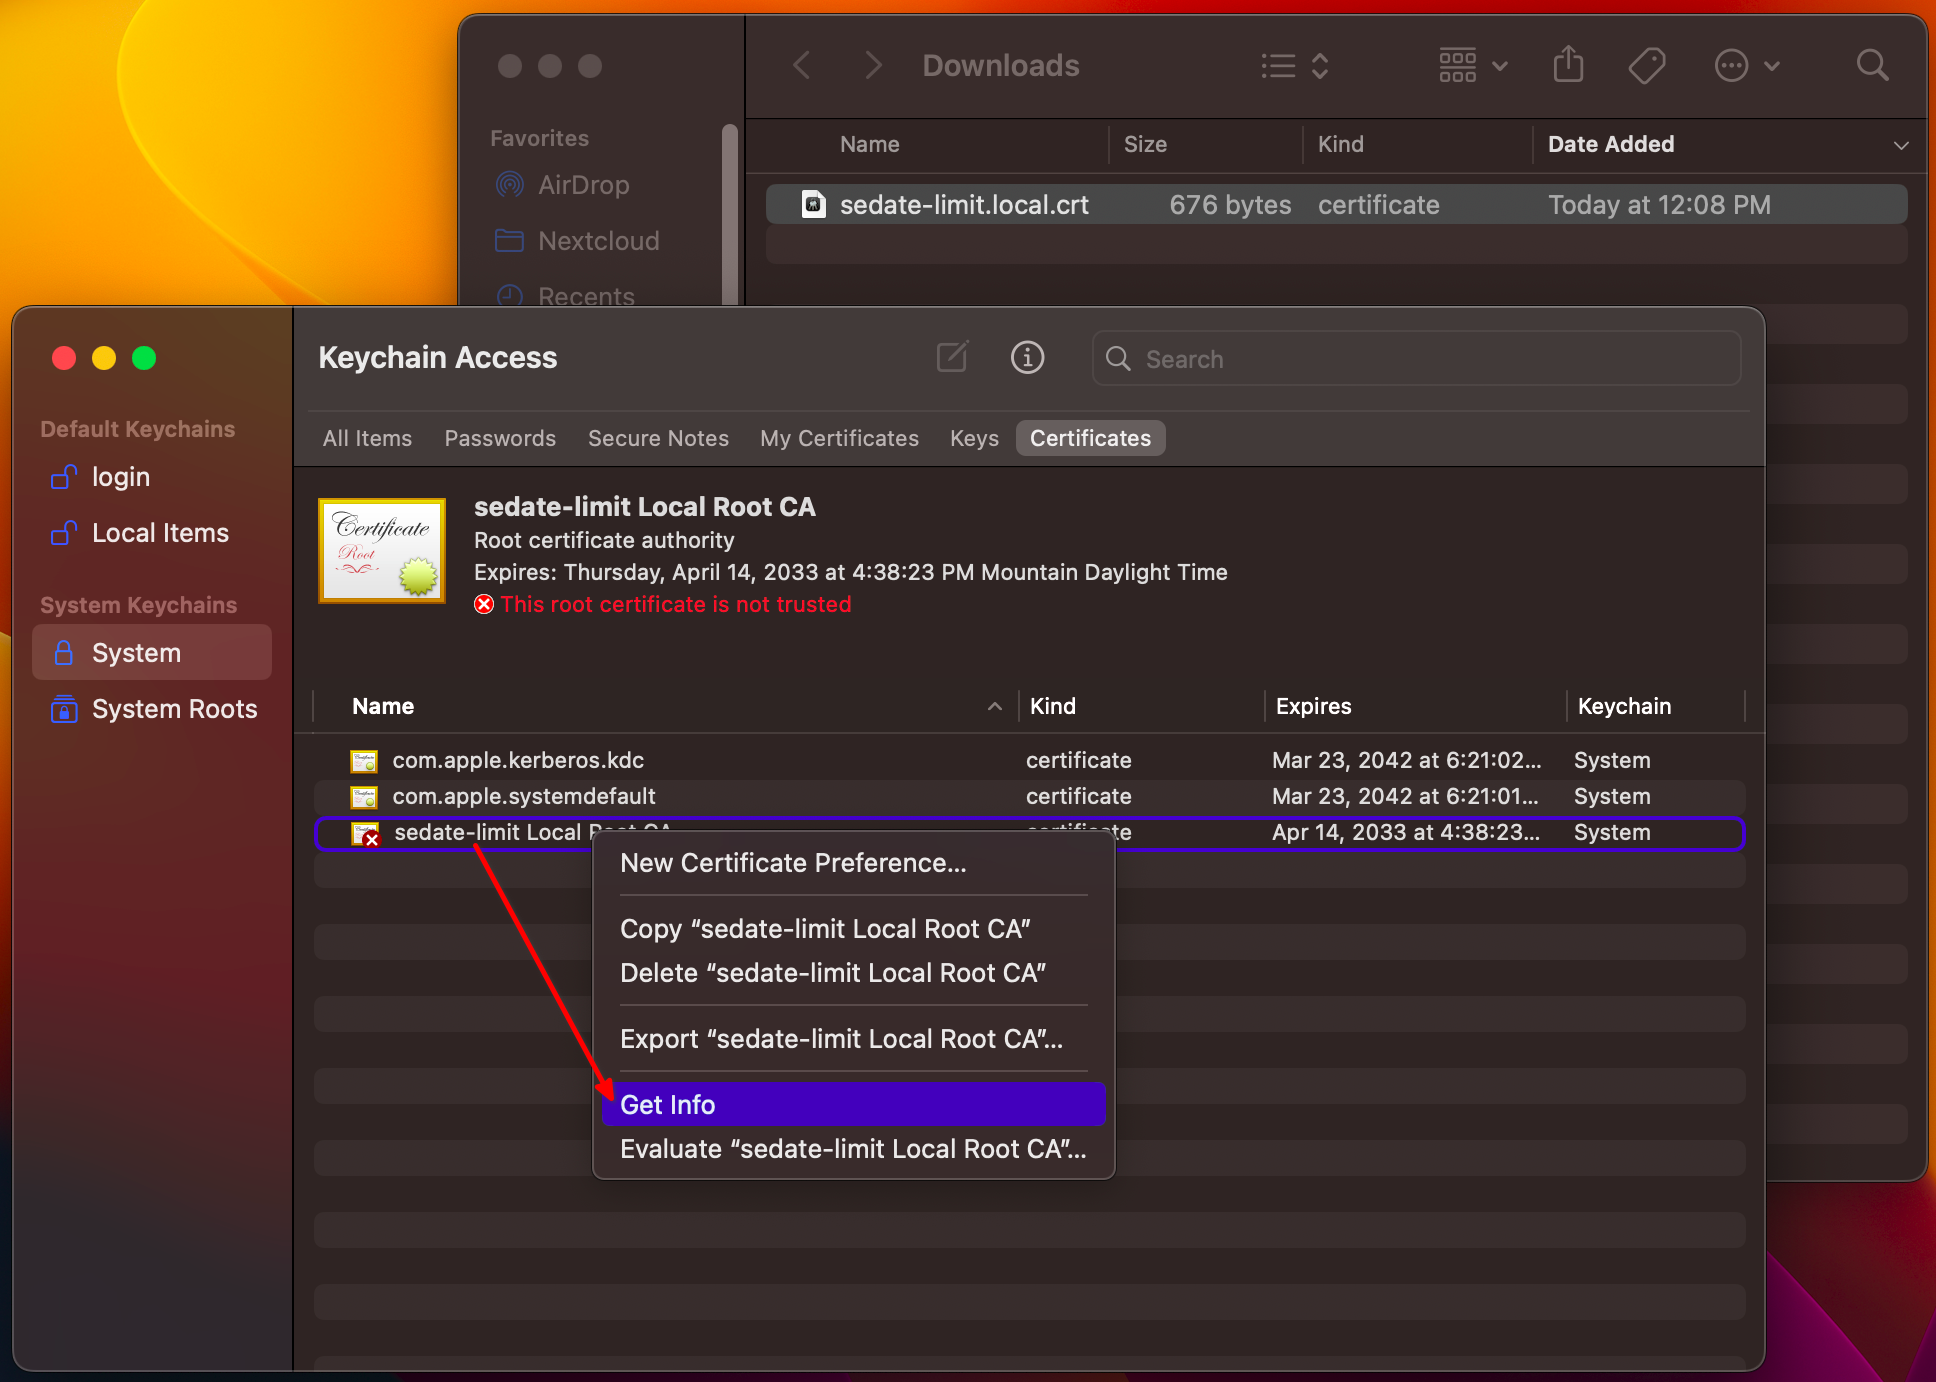
Your server’s CA certificate will be displayed among the imported certificates in Keychain Access. Right-click on the imported CA cert and select Get Info:
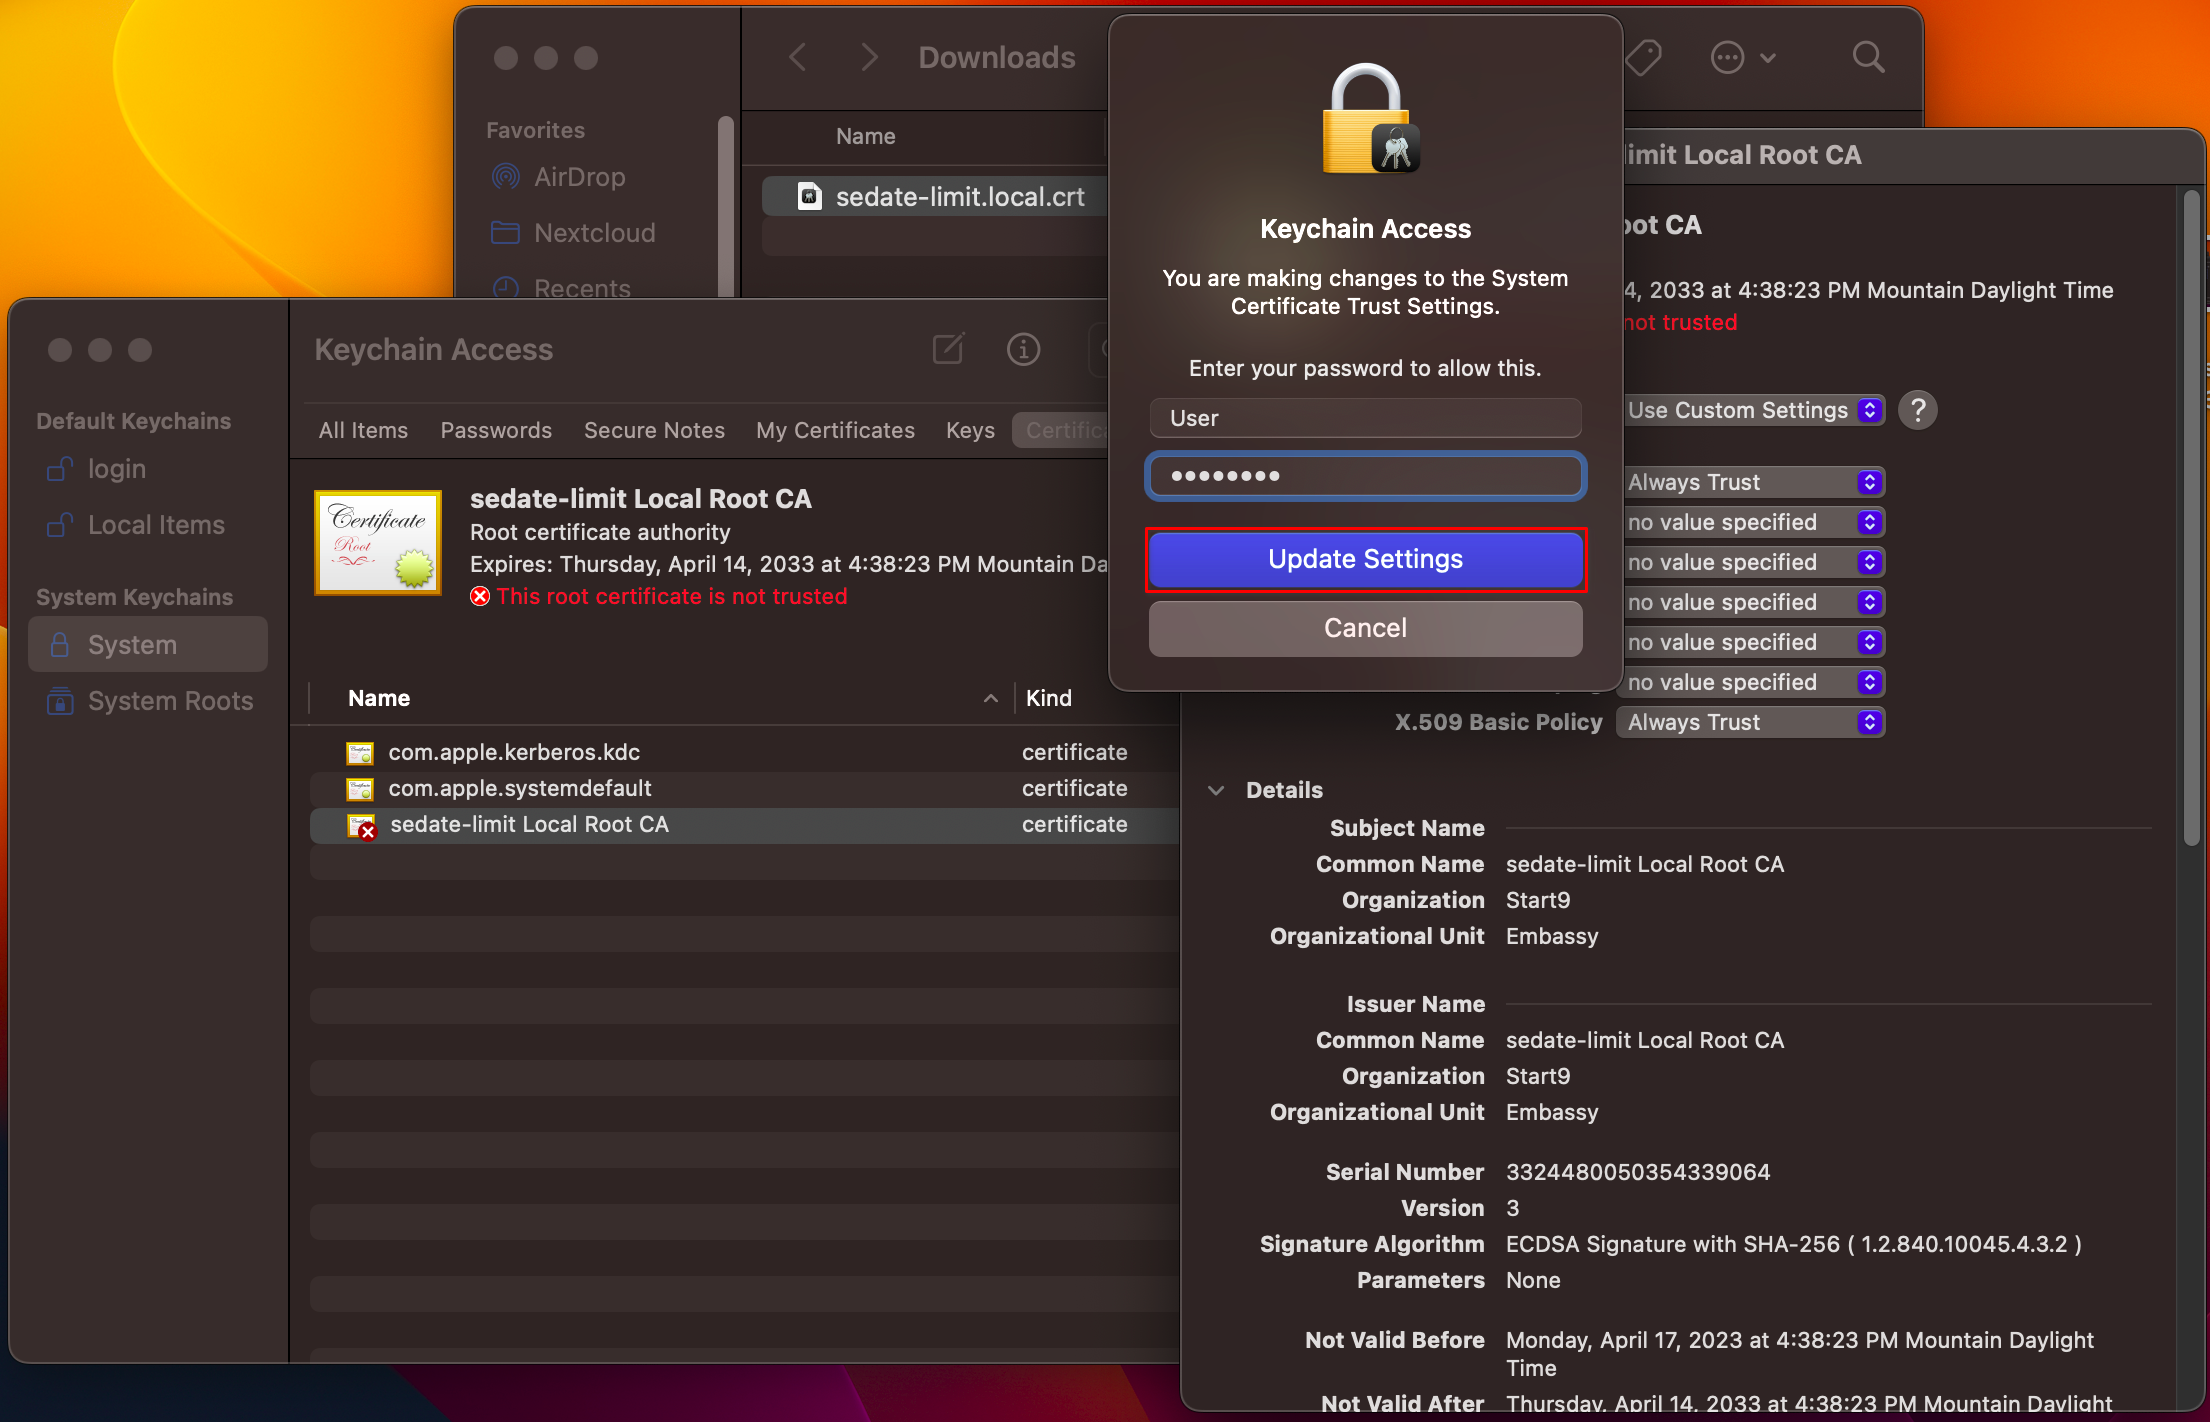
The details of your CA certificate will be displayed in a new dialog window. Expand the Trust heading, then select “Always Trust” on Secure Sockets Layer (SSL) and X.509 Basic Policy.
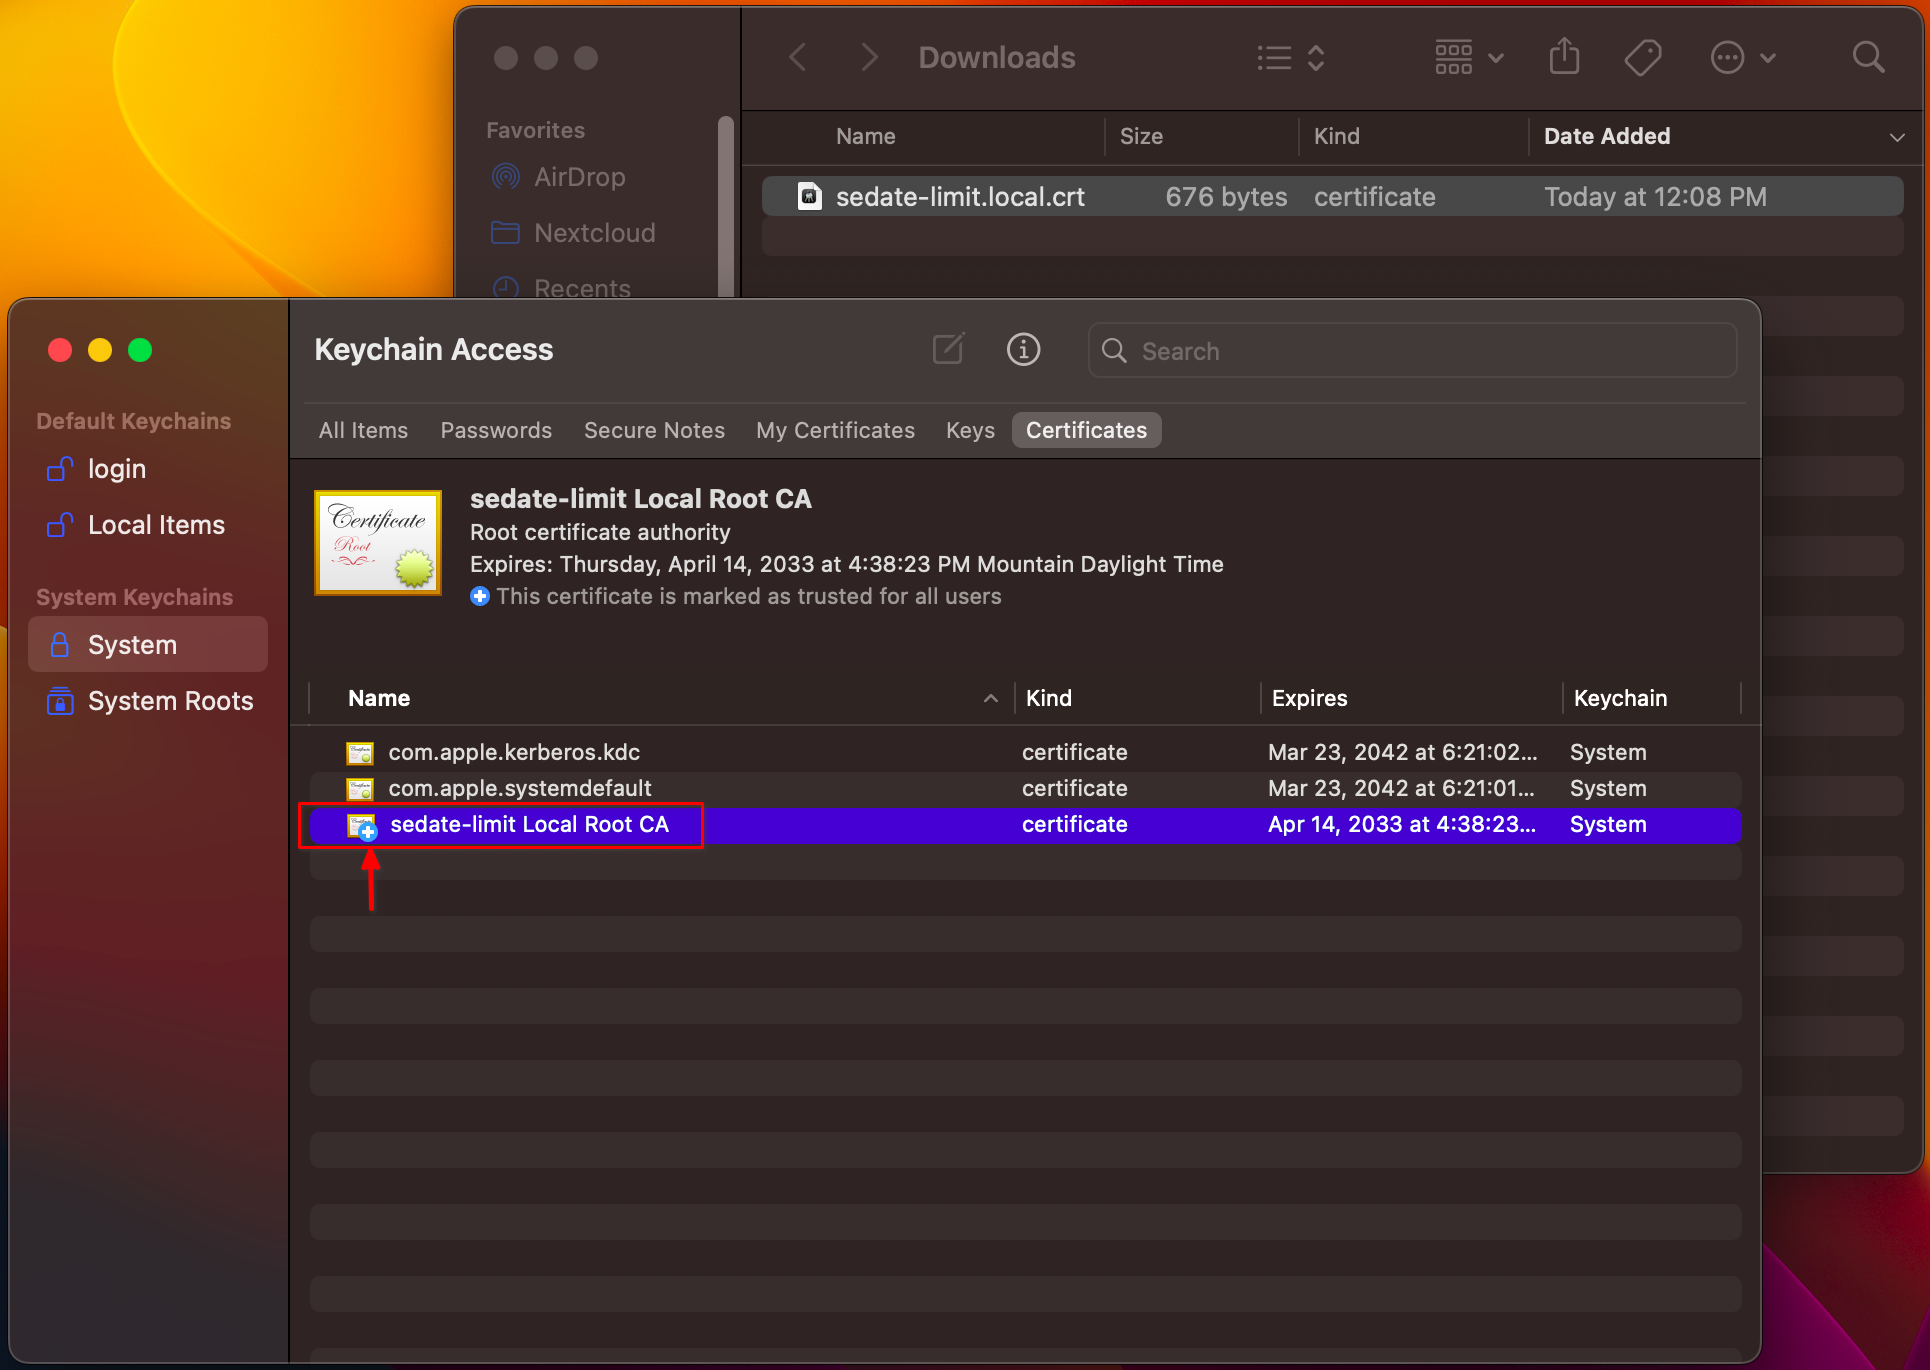
Click the red (x) button at the top left of the Local Root CA dialog window.
You will then be prompted again for your username and password, or thumbprint. Enter those and click Update Settings:
You will see your server’s CA certificate as trusted now, signified by a blue (+) sign and the CA cert information will now say “This certificate is marked as trusted for all users” in Keychain Access:
Tip
If the keychain console did not show the certificate as trusted, press “Command + spacebar” and type “Keychain Access”, and hit enter to re-open it.